
 Heat pressing multiple layers of vinyl on any material seems quite easy on a YouTube video. But, when you get down to business, the realization settles in that the task is quite tricky.
However, this complex task can be turned into an easy job, if you are aware of the dos and don’ts. The process of heat pressing multiple layers of vinyl has a few requirements that need to be met to get a perfect result.
To save you from hopping from one site to another to find the perfect procedure, I have shared the entire process in simple words in this article.
How To Heat Press Multiple Layers Of Vinyl
With the step-by-step guide below, you will be able to transfer multiple layers of vinyl easily.
Items Needed
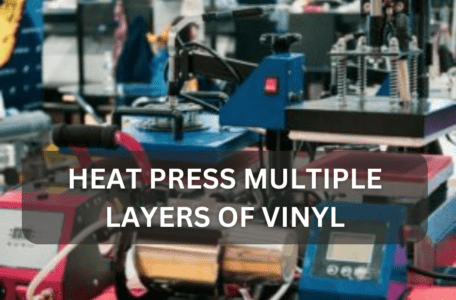
If you wish to heat press more than one layer of vinyl, then there are a couple of items that you will require. You will need a heat press machine and a clean and pressed surface for transferring the vinyl. Moreover, you will also need multiple vinyl stickers. You can use matte stickers, holographic, and some glitter stickers. You can also heat-press multiple matte layers as well. You also need a sheet of strip flock vinyl and a sheet of parchment paper. Make sure that you have printed a base of your complete design on the strip flock vinyl.
Step 1
You need to start by cutting out the vinyl stickers that you want to layer on the shirt. Make sure that all the stickers are cut precisely. After that, turn your heat press machine on and set the time and temperature. You need to set your heat press at 315°F to a maximum of 320°F. Moreover, the time range for vinyl is higher, but that is not the case for multiple layers. The time should not exceed 5 seconds per layer.
Step 2
Once the machine is ready, then you need to place the fabric that you want to transfer vinyl onto. After placing the material on the bottom platen, shut the top platen for 4 to 5 seconds. This will pre-press your material and get rid of any moisture lingering in the fabric as well as creases. Moreover, this pre-press also shows you if the pressure of your heat press is accurate, or does it require adjustment. If it does require adjusting, then you should fix the pressure according to the requirements of your project.
Step 3
Open the top platen after the pre-press, and place the strip flock onto the shirt, where you want to heat press vinyl layers. The reason behind the presence of strip flock vinyl is that it keeps the first layer of vinyl from shrinking when the machine is pressing more layers. Moreover, strip flock vinyl also provides a base for the other layers of vinyl. So it makes it easier for you to place the multiple layers of vinyl in their correct spot. Press the strip flock vinyl for a maximum of 5 seconds. Peel off the transfer sheet carefully, making sure you do not rip off the base design.
This entire procedure can also be done without using strip flock vinyl. But, that will require you to guess where every layer of vinyl goes. For a beginner, that can be a challenge. So, it is best if you use a strip flock vinyl that gives a shadow to the overall design, and a base to the user.
Step 4
After the layer of strip flock vinyl has been pressed, place the first layer of vinyl that you wish to heat press. Place the parchment sheet on top of the vinyl to keep it from sticking to the top plates of the heat press. Shut the top platen and press the first HTV sticker for 5 seconds. The reason behind pressing for a shorter period is that you will be pressing multiple layers, and the longer time of each layer will cause damage to the one that was pressed initially. Remove the top platen after the first press, and peel off the transfer sheet. Again, peel very carefully so that you do not rip off the vinyl underneath.
Step 5
After you have pressed the first layer of vinyl, start pressing the rest of the layers one by one. Repeat the same procedure step-by-step for each layer. Make sure not to press any layer for longer than 5 seconds. Moreover, peel the transfer sheets very carefully after every press. As vinyl is hot peel, you need to peel off the sheet immediately.
When you are down to your last layer, press it for 10 seconds. This will make sure that if any vinyl layer is not properly set, it sticks to the shirt perfectly. After the last press, peel off the transfer sheet, and you have got yourself a design with multiple layers of vinyl.
Conclusion
To make sure that heat pressing more than one layer of vinyl gives the same beautiful result as a single layer, you need to follow a couple of conditions. The entire procedure has been shared in layman’s terms in the article above. So, even novices can get the hang of it easily.

I’m Henry Collins and living my happy life. I’m a professional businessman and I own and run 6 Heat Pressing Services stores where I provide my clients with custom Designs on hats, mugs, T-Shirts and a lot more using Heat Press Machine. Been using a heat press for the last 4 years and people love my work. As I’ve got enough information on Heat Press I decided to make a blog on it and share my knowledge with the world. I hope, the world will appreciate it.