
Transferring images via your heat press can be more than a way to pass the time. You can make your own designs through screen print for transferring and converting this into a side hustle. However, the initial step of that would be learning how to make screen print transfers for the heat press.
Digitally printed images are also a great way for bringing your designs to life, but when it comes to color accuracy and detailing, screen print transfers take the cake. They offer a much higher color accuracy as well as all the sharp lines of the designs.
Therefore, why opt for mediocre transfers when you can have the best? Put all your digitally printed transfers aside, and give a thorough read to this article. I have shared the entire procedure of making screen print transfers for heat press in simple and easy steps below.
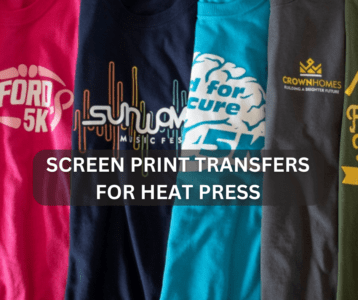
How To Make Screen Print Transfers For Heat Press
You are going to learn how to make screen print transfers for heat press by keenly following the procedure below.
What Are Screen Print Transfers For Heat Press?
Before we get down to business, let me elaborate for novices on what screen print transfers are and how are they different from regular transfer designs. Screen printing uses a mesh material stretched in the middle of a frame. The mesh contains a design which is transferred onto another material for heat pressing. Unlike regular transfer designs, you do not use a printer for printing out transfers for heat pressing.
Making Screen Print Transfers For Heat Press
Items Needed
Now that you are aware of what is screen print transfers, it is time for you to start making them. You are going to require a screen with the design of your choice, transfer paper, ink, squeegee, parchment paper and some adhesive powder. You also need to place all these items on a table in a well-lit area.
First Step
Place your transfer paper on a board or any surface that is firm and flat such as a tabletop. Now you need to make sure to place the transfer paper in reverse. Before placing the screen flat on the transfer paper, add some ink to the design on the mesh and spread it all over the design surface with your squeegee.
Second Step
Once your transfer paper is in place, you need to bring your screen and place that on top of the transfer paper. Make sure to place the screen straight and the design should be right on top of the transfer paper. Now you need to take your squeegee and hold it on the screen at the beginning of the design. Drag it across the entire design, and it will take all the access ink away. Make sure not to apply too much pressure on the squeegee while dragging.
Third Step
Lift the screen from the transfer sheet immediately after you have dragged the ink. If your design has multiple colors, then you need to repeat this procedure as many times with different colored inks. Once the entire design has been transferred onto the transfer paper, lift the screen and place it away, as the next steps do not require this. Now you need to add some adhesive powder to a plate or a bowl. Take the transfer paper to the bowl, and with your fingers, add some powder to the design. Make sure to only sprinkle a little and then dust it right off. Dusting it off will help you get rid of the excess.
Fourth Step
Now you need to put your transfer paper through one last step before it is ready for your heat press, and that step is flash curing the ink. You are going to need your flash dryer for that. Place your design on one end of the flash dryer and make sure to set the temperature of the dryer between 180 degrees Fahrenheit, to 260 degrees Fahrenheit. Make sure the temperature does not exceed 280 degrees Fahrenheit.
Fifth Step
Once the transfer sheet emerges from the other end of the flash dryer, your transfer design is ready for heat press. Take the design to the heat press, and put it on the garment face down. Make sure to cover it with parchment paper, and close the heat press. Lo and behold, that is all you need to do to make screen print transfers for your heat press.
Precautions For Making Screen Print Transfers
The first precaution that you need to follow is to never add too much ink to the screen. You also need to make sure that the ink should never be too thick in consistency, if it is thick then you should always dilute it before adding it to the screen. Thick ink does not penetrate through the mesh completely, giving you an incomplete design. In addition to that, you need to hold your squeegee to a 70 to 75-degree angle on the screen, do not hold it completely straight. Moreover, never add too much pressure on the squeegee while dragging the ink. Another critical thing to keep in mind is that if you flash cure at a higher temperature, your design will not transfer on the garment. Lastly, make sure to only add a little sprinkle of adhesive powder on the transfer sheet.
Conclusion
The stunning results of screen print transfer that every person yearns for can only be acquired by following the right guideline. Otherwise, you will only end up with a partially transferred design and disappointment. Lucky for you, the article above has the steps for making screen print transfers along with some precautions that will help you achieve the best results.

I’m Henry Collins and living my happy life. I’m a professional businessman and I own and run 6 Heat Pressing Services stores where I provide my clients with custom Designs on hats, mugs, T-Shirts and a lot more using Heat Press Machine. Been using a heat press for the last 4 years and people love my work. As I’ve got enough information on Heat Press I decided to make a blog on it and share my knowledge with the world. I hope, the world will appreciate it.