
 Thanks to the evolution of technology,
The printing business just like all the businesses around the world has seen jacking up with the presence of numerous machines that converse your time plus deliver outstanding results.
And the addition of a heat press machine in your printing business is one of its kind to showcase a high level of professionalism.
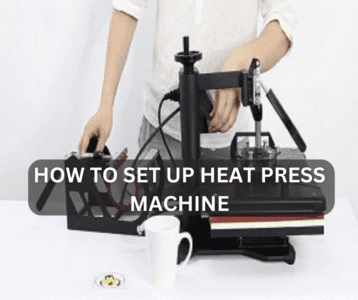
But the problem seems to be lying as to how to set up heat press machine ensuring satisfying results across the printing projects.
Once set up correctly, the machine then needs not to take intermittent rest periods during the work.
What you Need to Do before Setting up Heat Press Machine
No fancy in it — all you actually need to do is take the machine out of the box, take care of the warranty cards,
Hook in the power cord but do not plug it in the power post.
The next step is what initiates the setup process.
How to Set up Heat Press Machine for your Printing Projects
An investment worth the value, owning a heat press machine by the business is the right choice.
You do not have to rush towards other printing shops —
It is like a one-stop shop that not only sews the t-shirts (or such) but also prints designs the way the customers demand.
So, we first congratulate you on this addition to your business — a pretty wise move we must state!
Setting up the heat press machine is a seamless process without being involved in the hassle.
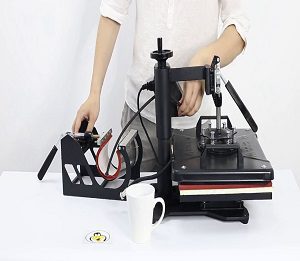
Imagine the heat press machine is coming out of the box for the first time and putting on the work.
- You must gather four hands first to lift the heat press machine out of the box given its heavier weight and with extreme care
- Do not set it over an uneven and traditional table because it needs to be placed with stability. Rather you should get dedicated tables like a caddie stand or the equipment cart
- Insert the power cords on both ends; from the machine to the power post
- Turn on the power switch using the on/off button placed on the machine
- Dial the thermostat knob to the right side before it pops up to glow red heating light
- Wait for a bit and when the machine reaches the desired temperature for the transfer, now turn the knob back again to the left side and see when the light turns off
- This makes the heating temperature regulate in reaching the desired temperature itself when you experience the light turning on and off
- Or if you have a digital meter on the machine, you then do not have to oversee the thermometer as the machine would itself raise the alarm when you press the start timer button. Once the alarm goes on, you can press the stop button to reset
- Now lift the handles to open up the press
- Lay down the t-shirt along with transfer paper over the shirt in face down form
- Down the handle and wait for it to retain the firm lock confirming the press’ handle is in place
- Hit the timer again and set its timer according to the instructions advised by the transfer paper
- After it is done, lift the handle and open press
- Peel out the transfer paper to detach it from the shirt
- And then wait for up to 24 hours to have the print locked up proper before testing to wash the t-shirts
3 Tips to Cater for When Using a Heat Press
If you ask us what critical tips that you can employ when using a heat press, just follow these all out to use the machine worry-free;
Do not Mind Applying too Much Heat
And it is not a problem applying too much heat in the wake of burning down a t-shirt.
Agree or not, the artwork requires a lot of heat to emboss over the fabric.
It really is not a problem giving high heat but the issue of burning the shirt down lies in giving more time at high temperature.
So, the high heat is not a culprit here but the time is.
If it is your learning phase to use a heat press machine,
We would suggest using an old and unused t-shirt for the sake of practice and building your confidence before trying out with real customers’ projects.
Select your Fabric Wisely
Extreme caution — no thin and synthetic fabric can go into the heat press machine.
However the fabrics made with nylon, polyester, cotton, spandex, and Lycra should be the types that can be exposed to high heat.
Pick the Right Transfer Paper
Before the printing even starts, the first problem you may heavily face is picking the wrong transfer paper.
And going with the wrong transfer paper, would not only waste your time but also ruin the transfer paper plus t-shirt which you cannot really afford to lose.
Picking the right transfer paper is the research done the right way — not all of them would work as per the requirement.
You may experience the transfer papers solely made for inkjet printers.
So, you should only get the papers rated for inkjet printers.
However, the laser printers support different transfer papers.
When purchasing the transfer papers, ask the business to provide you with the papers either for inkjet or laser printer.
You must not forget this part or else you would end up purchasing the wrong transfer paper ready to cost you a lot in terms of time and money.
Conclusion!
Using the machine seems complex but the fact is,
it needs proper practice before you start to use it the right way.
You would need to be careful during your first few tries of learning how to set up heat press machine on your own, and after that, you might be having the novices learn to set it up correctly.
So, it is not about using the heat press machine but using it properly so that you do not cost any damage to it.

I’m Henry Collins and living my happy life. I’m a professional businessman and I own and run 6 Heat Pressing Services stores where I provide my clients with custom Designs on hats, mugs, T-Shirts and a lot more using Heat Press Machine. Been using a heat press for the last 4 years and people love my work. As I’ve got enough information on Heat Press I decided to make a blog on it and share my knowledge with the world. I hope, the world will appreciate it.