
 What we love about the heat press business is its ultimate diversification model.
You do not end up imprinting just a single piece of material all day long.
And as the summer is fast approaching, the rise of using hats (or caps) is about to boom and we will start seeing the heavily-designed hats in the market.
For the customers, they just love the well-designed hats to wear and look unique.
But for the heat press business owners, they know the worth of the upcoming season which means a big business waiting to knock on your door!
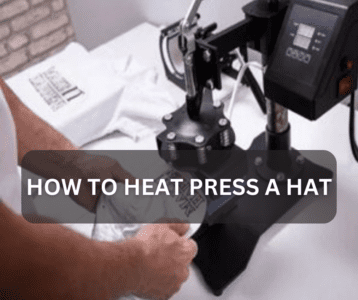
How to heat press a hat despite its contoured shape where it cannot be heat pressed using the regular heat press machine.
Stick with us to find the whole procedure (and we would be clearing up the confusion as well!)
How to Heat Press a Hat
It is a lot simpler than it sounds. And, this heat press process takes in a specialized hat press arm to complete the task.
What’s Needed for Heat Pressing a Heat using Hat Press Arm
- Heat transfer vinyl
- Weeding tool
- Cutting mat/board
- A hat
- And heat press machine including a hat press arm
The Heat Pressing Procedure for a Hat
This begins the procedure of heat pressing the design over a hat. We bet you can easily imprint your favorite designs on hats given the fact you solely follow all the steps.
Step #1: Create Designs
Some people wear plain hats but to us, why wear a simple hat in the first place?
So, we better get to create a new design from scratch or use the pre-made ones which we can buy from the market.
If you go with the latter method, this could save you the time plus money to buy some tools to get your own designs created.
But creating the design is just fun — you can just think of anything and get it ready using graphic software.
But make sure to cater to the measurements of the hat because not a wide and bigger design can go upon it due to the limited size.
Upon deciding which design to go with, simply print it out on paper and trace it on the HTV making it ready for heat press.
Steps #2: Weed the Design
As you already have the design ready and traced on HTV paper, it is time to cut and weed the design.
Now, lay the design over the cutting board/mat and cut all of HTV carefully. Make sure to only cut the paper and not the design which would look unpleasant on the hat.
To get rid of the excess vinyl, weed the design to make it look complete and ready to go on your hat.
Step #3: Pre-Heat Press Machine
Now, plug the heat press machine on, set the temperature and timer settings according to the HTV material you are using, and wait for a few minutes for it to heat up.
Do not rush to get your hat imprinted with your favorite design, go slow!
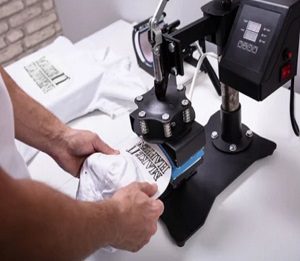
Step #4: Place the Design over Hat
Before getting the hat into the heat press machine, the design should sit on the hat to make certain it positions well.
Once you find everything in place, apply the thermal or heat tape around the edges of the design not to dislocate when it goes into the heat press machine.
Step #5: Put Hat into the Machine
Since we are using a specialized hat press arm where it is almost impossible to use a standard heat press machine;
Even its hat-shaped arm lets the hat sit over, there are a few complications that need to be dealt with.
You have to keep a hold of a hat during the transfer,
so it is better to place a thick piece of fabric on the inside part of the hat to keep it positioned so that you can hold onto it.
Step #6: Start the Heat Press
As you ensure the hat is in place and tightly held, it is time to start the heat press process.
Just make sure to hold it tight so the heat spreads evenly.
The hat press arm here is spacious enough to accommodate almost all sizes of hats, so you do not have to keep them sliding in the hope of primarily sticking the HTV on the edges.
Step #7: Get the Hat Removed
Finally, the transfer has been completed, now remove the hat from the hat press arm and let it cool for some time before peeling the sheet.
After this last step, you have your hat embossed with your favorite design!
Now, do not just walk with a plain-looking hat! Give your hat a treat for the newly-printed design!
How Long Does a Heat Press on a Hat Last?
Well, that depends on the HTV as it can generally last for up to fifty washes.
And to extend the lifespan of what you embossed on the hat, wait for at least 24 hours before washing it, and not use the hot water.
Also, do not include detergents or other washing chemicals which can badly impact the design forcing it to come off.
Lastly, do not stuff it into the washing dryer instead, go with air-dry mode.
What Should be the Temperature to Heat Press a Hat?
Okay, that depends on the HTV but the regular temperature can be set to around 305F degrees to conduct the standard HTV-based vinyl on the hats.
Still, read out the instructions to better understand the temperature setting if you do not know.
The better the temperature, the finest transfers you would get every time.
Conclusion!
Being into the business of heat press, it is vital to know how to heat press a hat to emboss the customers’ favorite designs.
And when you have all the types of machinery at hand, pre-making the own designs as well as providing the options to the customers to bring their designs for imprint could add the turning point into your business.
So, get set to rock the entire town by offering heat press service to custom-design hats! 🙂

I’m Henry Collins and living my happy life. I’m a professional businessman and I own and run 6 Heat Pressing Services stores where I provide my clients with custom Designs on hats, mugs, T-Shirts and a lot more using Heat Press Machine. Been using a heat press for the last 4 years and people love my work. As I’ve got enough information on Heat Press I decided to make a blog on it and share my knowledge with the world. I hope, the world will appreciate it.