
 Instead of utilizing the old-school method of gluing rhinestones, using a heat press for transferring rhinestones will get the job done in a matter of minutes. Along with taking a limited amount of time, heat-pressing rhinestones will always give you a neat and clean result.
However, heat pressing rhinestones is not the same as heat pressing other items. There are a couple of things that need to be watched out to get that perfect and neat bling.
Therefore, instead of trying your hand at this procedure with wild guesses, you need to find out and follow the proper method. For your ease, I have jotted down the entire mechanism in clear and easy steps below.
How To Heat Press Rhinestones
Follow the steps stated below to heat press rhinestones to any fabric or shirt.
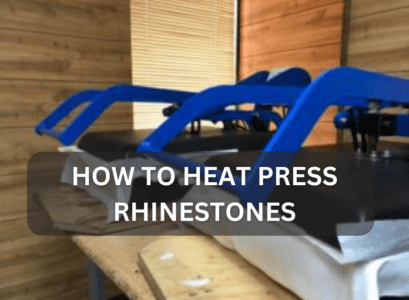
Turn The Machine On
Place your rhinestones, a pro-grade non-stick sheet, and the fabric that you want to heat press the rhinestones onto your worktable. Plug the heat press into an outlet and turn it on.
Set The Time And Temperature
After your heat press has turned on, you need to set the time and temperature settings of the machine. It is critical to make sure that both the settings are fixed according to the nature and the requirements of the project. The ideal temperature is between 300 Fahrenheit to 330 Fahrenheit. Moreover, the time should not exceed 15 seconds. If your heat press comes with pressure, you need to adjust that as well, before you place your shirt between the two platens of the machine.
Place The Fabric
Take your shirt, and place it on the bottom platen. Make sure that the shirt is free from creases. It is best if you heat press the fabric for 4 to 5 seconds before starting to work on it. The pre-press gets rid of all the moisture as well as creases. It also prepares the surface for a neat rhinestone transfer. After a maximum of 5 seconds, remove the top platen.
Placement Of The Rhinestones
No matter which rhinestone sheets you are utilizing, they all usually come enclosed between two sheets. There is a clear carrier sheet and a backing sheet which is mostly white or black. You need to peel off the backing sheet. After removing that, take the rhinestones carrier sheet and place it on your shirt. Make sure that you place it with the clear sheet facing the upward platen.
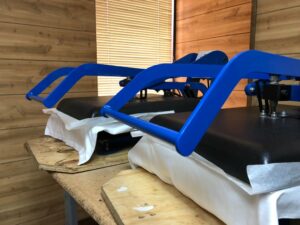
Covering The Rhinestones
Place a pro-grade non-stick sheet on top of the rhinestone sheet to make sure that nothing gets stuck to the top platen. After that, you are good to go. Shut the top platen down and hold it there till you hear a beeping sound. The beeping indicates that the time is up. So, when you hear it, lift the top platen upwards.
Revealing The Rhinestones
Remove the pro-grade non-stick sheet from the heat press. Then proceed to remove the shirt from the press as well. A critical detail to keep in mind here is that you should never peel the carrier sheet immediately from the shirt after taking it out of the heat press. If you do that, it will pull rhinestones off your shirt. Let the fabric cool down for a couple of minutes. Start peeling the carrier sheet of the rhinestones when the fabric has lost all of its warmth. Make sure to peel the sheet slowly and carefully. Throw the carrier sheet in the bin, and your newly heat-pressed rhinestone shirt is ready to be worn and flaunted.
Conclusion
Like every other item that you heat press onto a fabric, heat pressing rhinestones also has its own specific method. Do not fret, the method is quite simple, and it has been shared in even more simplified words in the article above.

I’m Henry Collins and living my happy life. I’m a professional businessman and I own and run 6 Heat Pressing Services stores where I provide my clients with custom Designs on hats, mugs, T-Shirts and a lot more using Heat Press Machine. Been using a heat press for the last 4 years and people love my work. As I’ve got enough information on Heat Press I decided to make a blog on it and share my knowledge with the world. I hope, the world will appreciate it.