
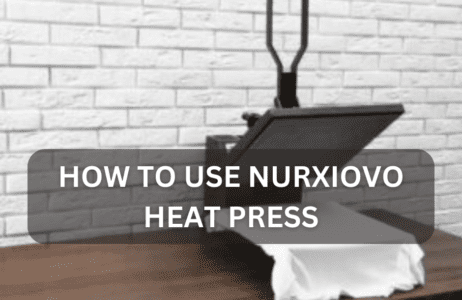
 As handy as a Nurxiovo heat press is, if you do not know what you are doing, this nifty machine can become a headache in less than a minute. The heavy-duty design of the machine is enough to dumbfound any first-time user.
Instead of shying away from using it due to the complexity of the controls, you can learn how to use a Nurxiovo heat press in a couple of minutes. I have covered the entire procedure in a couple of simple steps that even a novice can understand. So, let’s dive right into the procedure of how you can use a Nurxiovo heat press conveniently at home.
How To Use Nurxiovo Heat Press
The entire procedure of using a Nurxiovo heat press has been shared below in simple and easy steps.
Turn On The Heat Press
Before you get to the part of actual printing, you need to turn the heat press on. Plug the cord of the heat press into a power outlet, and then press the red button that is located at the side of the heat press. Once you press the button, the heat press will roar to life.
Set The Temperature And Time
The next thing that you are going to do is set the temperature and the time on your Nurxiovo heat press. Lucky for you, the manufacturers have added both settings right at the front of the heat press at a control panel. The small screen located at the front displays the temperature, and the time right below it. There are two arrow keys present right next to the display screen. These arrows allow users to tinker with the settings and set a temperature and time that befits their project’s requirements. Once you have selected the desired temperature and time, click on the button below the arrows that is labeled ‘set’.
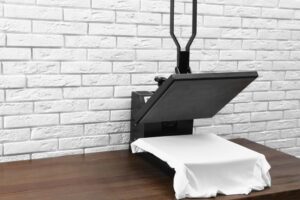
Place The Fabric
Once the temperature and the time of the heat press have been set, it is time for you to place the shirt or the fabric that you want to print on the base plate. Move the top of the heat press away in order to stay safe from the heat whilst you set the fabric. Moreover, you need to make sure that the fabric of the shirt is laid out perfectly, free from any wrinkles. This is a critical step as the fabric needs to be laid out perfectly straight.
Place The Printed Design
Once the fabric is laying flat on the base plate, take the printed design that you wish to transfer and place it on the fabric. You need to use tape to hold the design in its place. It is of utmost importance that you use heat-resistant tape and not any regular tape, as the latter will melt into the fabric due to high heat. Add small pieces of tape to the top of the design, as well as the sides and bottom. Once your printed design is in position, add parchment paper on top of the design. The addition of parchment paper sees to it that the end result is smooth.
Shut Down The Top Lid
After you have aligned the design and the parchment paper perfectly, it is time for the last step, which is closing the top lid of the heat press. Pull the top of the heat press back until it is directly above the base plate, and push it down. Use the lever present at the top of the lid to push it all the way down till the lid is tight against the parchment paper.
Open The Lid Up
After the pre-set time is up, it is time for the moment of reveal. Push the lid back up again with the help of the lever. Swing the lid to the side to get clear and safe access to the project sitting on the base plate. Keep in mind that the fabric will be really hot, so wait for a couple of seconds before you attempt to remove it from the base plate. After a couple of seconds, peel off the parchment paper. Lo and behold, the design has transferred to the fabric beautifully, without any cracks or tears.
Conclusion
A Nurxiovo heat press is a one-of-a-kind machine that delivers amazing results, every single time. But, the amazing results will only be guaranteed if you use the heat press the proper way, as I have shared above in a few easy steps.

I’m Henry Collins and living my happy life. I’m a professional businessman and I own and run 6 Heat Pressing Services stores where I provide my clients with custom Designs on hats, mugs, T-Shirts and a lot more using Heat Press Machine. Been using a heat press for the last 4 years and people love my work. As I’ve got enough information on Heat Press I decided to make a blog on it and share my knowledge with the world. I hope, the world will appreciate it.