
Owning fancy USCutter heat presses will do you no good when you barely know how to use them. To enjoy the multiple benefits a model has to offer you need to be aware of how it works. Therefore, learning how to use a USCutter heat press properly is a critical step.
When it comes to heat presses, USCutter has designed and provided its buyers with a multitude of options. There are different models in the market, each with its own unique features. So, unless you know how your model works, there is no way for you to get your money’s worth out of it.
To make matters easy for you, I have devoted an entire article to this dilemma. In the article below, you will find the two most common types of USCutter heat presses along with clear steps on how to use both of them. Therefore, without any adieu, let’s talk about how you can use your USCutter heat press.
How To Use USCutter Heat Press
The steps below will help you learn how to use your USCutter heat press.
USCutter Heat Press And Its Types
USCutter is a very prominent name when it comes to heat presses. They have designed some of the best models. However, each and every model of theirs is not the same, they come bearing many differences. The first distinct difference is the type of heat press i.e., clamshell heat press and swing-away heat press. No matter which model of heat press you own, it will come under one of these two types. Therefore, instead of learning about your specific heat press, learn how these two types work and you will be able to operate any USCutter heat press conveniently.
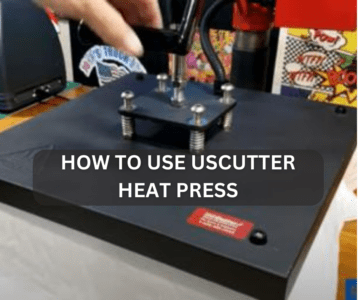
A Clamshell USCutter Heat Press
The first type of USCutter heat press is the clamshell. These heat presses come with two platens, and a thick handle present at the top platen. As the name indicates, this type of USCutter heat press has a clamshell design. It comes with a fixed lower platen that does not budge and an upper platen that only moves in a vertical direction only. When the heat press is opened, the top platen of the machine is raised a couple of inches over the bottom platen with the help of the handle. Unless it is pushed back down on the lower platen, the upper platen hovers in its place. The opening shape of the machine is slanted with a wider opening from the front and a narrower from the back. It resembles a shell opening; hence the name.
How To Use It
Once you have hooked your heat press to a power outlet, turn it on with the help of the power button. There is a pressure knob present in the centre of the upper platen which is used to control the pressure the platens will apply. At the top front of the machine, there is either a single wider screen or two smaller screens. These screens show the time and temperature, and with the assistance of the buttons present close by, the users can adjust both of these settings for each press. Make sure to adjust the settings before placing your project on the platen. Then adjust the time and temperature settings. After this, you will need to open the platen, place your project on the bottom half of the heat press and then push the upper platen down. When the upper platen is pushed down, you need to add force to shut it completely. Once the time of the press is up, you can lift the upper platen with the handle and voila.
A Swing-Away USCutter Heat Press
The second type of USCutter heat press is the swing-away heat press. The procedure of using this type of heat press is quite similar to the clamshell with only a few minor differences. The first and major difference between the two is the opening style of the heat press. A swing-away heat press does not open like a clamshell. Instead of moving vertically, and hovering above the lower body, its upper platen swings horizontally which explains the name.
How To Use It
The machine comes with a small control board on either left or right side. This control board has the power button, a screen for showing the time and temperature of the press and a few smaller buttons for altering the two settings. The control board also has a smaller knob for adjusting the pressure of the press. You need to adjust all of these settings before you access the bottom platen and place your project on it.
Swing-away heat presses of USCutter come with a handle present above the top platen, you can use it to lift the upper platen from the bottom one and then swing it to the left or right side. Once the upper platen is out of the way, you can place your garment on the bottom platen with the design on top. Cover them with a protective sheet, and then bring the upper platen back to its original spot which is right above the bottom platen. Using the handle, you can push it all the way down till the project is clamped tightly between the two platens. Once the pre-set time of your press is up, you can lift the upper platen with the handle, and then swing it out of the way to check your project.
Conclusion
Heat pressing may start as a hobby but it often moves to the professional level. However, for that to happen you need to learn every part of your machine inside out, especially if you have a USCutter heat press. Read the article above to find out how you can use the two different types of USCutter heat presses.

I’m Henry Collins and living my happy life. I’m a professional businessman and I own and run 6 Heat Pressing Services stores where I provide my clients with custom Designs on hats, mugs, T-Shirts and a lot more using Heat Press Machine. Been using a heat press for the last 4 years and people love my work. As I’ve got enough information on Heat Press I decided to make a blog on it and share my knowledge with the world. I hope, the world will appreciate it.