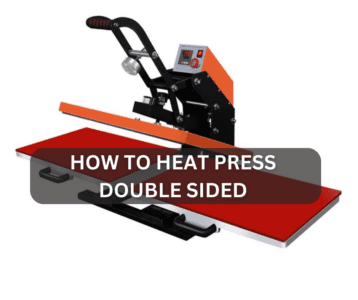
Heat pressing double sided sounds strange yet impossible to many and I was the part of this many, few months ago! But that’s not the deal now. Heat press is a useful machine with which you can easily and swiftly get done with your work.
Heat press is a one tool investment that can run a whole whopping business for years without needing any other tools. On top of that, heat press also produces quality even prints if you have a command on the machine.
But people fail to do the double sided prints with the heat press machine and that’s our purpose for today. We will be talking about how you can heat press double sided. Alongside that, since we have a team of experts, we will also be mentioning important stuff at the end. So, make sure you read but for now, let’s begin:
How to Heat Press Double Sided? – Detailed Guide
Duplex printing also discussed as double sided is the process of printing on two sides of a piece of paper. The majority of printers have a feature that lets you produce automatically on both sides. And, some printers include guidance on how you can do it. So, here is a detailed guide for you to heat press double sided!
Step 1: Preparing the machine
In preparing the machine, there comes some basic points of putting it on stable platform. Making sure it is switched one. Most importantly, it also includes the transfer. Talking about that, there are different types of transfers that you can use to work with the heat press machine.
Step 2: Printing the pattern:
With an image editing application, invert an image that you like. Use an ink jet machine for printing it out on specialty transfer paper. One more thing that you must ensure that the paper’s film side is facing up during printing.
Step 3: Cutting the pattern
This is only required for transfers that were printed, supplied, or purchased in a store. The motion picture layer will be imprinted onto the entire shirt, including the uncolored areas, when you utilise the transfer. To prevent the blank portions of the picture from being transferred, you must cut the area surrounding your photo.
Step 4: Setting the temperature
Open the press by raising the latch. The silicone pad should be separated from the hot baseplate. While it warms up in the following phase, hold the press open. Now, we need to set the temperature and if you’re unsure of what temperature to use, read the directions on your card stock.
Step 5: Adjusting the pressure
Turn the pressure adjuster in a forward or anticlockwise direction to change the pressure. Your project’s thickness will determine the force needed; the thicker the object, the less force you’ll require.
Step 6: Pressing the shirt
If you are using heat transfers, you should place a Teflon sheet on the bottom platen to shield the first picture while pressing the second (plastisol or vinyl). In essence, if you need to press the image again for whatever reason after removing the backing sheet, you must cover it with a Teflon sheet.
Step 7: Close the press
Now, when you have placed the Teflon sheet, make sure one more time it is placed accurately and then close the lid of the heat press machine.
Step 8: Opening the heat press
Depending on the type you own, the lever will probably stay in place. Click the start button once more once the countdown goes off. By doing so, you can stop the machine and restart the clock. After that, open the heat press machine and don’t touch the material immediately.
Step 9: Pressing the other side
The ideal material to use is a Teflon sheet, which you can purchase from any printing store or off of Amazon. I condense, but I nearly always print on both sides. I wore the shirt without any padding. It works exactly great if I place the Teflon piece on top of the shirt.
But we are here for pressing on both sides, so for that place a small piece of cardboard on the inside of the garment first, then apply another pattern to the back if necessary. Press the garment once more after lowering the pressure with the plate height adjustment. This will prevent you from accidentally reheating the first picture.
NOTE: You can quickly expand your product range by adding two-sided items if you can perfectly press one-sided material.
Step 10: Getting done with the pattern
Lastly, now you see we have done the double-sided print on the heat press. Open the handle again and put the garment away and let it cool for few second. After that, remove the cardboard and your shirt is all done!
NOTE: If you heat press T-shirts as a profession and want copies that are more long-lasting and of higher quality, use professional-grade heat transfer paper.
Final words:
To sum up, if you scroll above I have discussed a 10-step guide to help you how to heat press double sided in an easy manner. The method is pretty simpler and quick too and you can make it more quick after getting some hands on practice.
Other than that, if you have anything to ask you can always come up on our website to get your answer. But, for now this was all from my side and I wish you good luck for your heat press!

I’m Henry Collins and living my happy life. I’m a professional businessman and I own and run 6 Heat Pressing Services stores where I provide my clients with custom Designs on hats, mugs, T-Shirts and a lot more using Heat Press Machine. Been using a heat press for the last 4 years and people love my work. As I’ve got enough information on Heat Press I decided to make a blog on it and share my knowledge with the world. I hope, the world will appreciate it.

