
Are you looking for a way to show off your creativity with clothing? Heat pressing is a great way to take an ordinary sweatshirt and create something unique. Whether you want to make a statement with an image or words, heat pressing offers endless possibilities.
Heating up your wardrobe just got easier. If you are looking for a quick and easy way to customize your clothing, then heat pressing is the way to go. You can express yourself with unique designs and patterns or add custom text to make a statement.
Heat-pressing can be the perfect way to add a unique and professional touch, whether it’s your own design, a company logo, or any other image. It is a simple process that has been used for years in the textile industry. It involves transferring an image onto fabric using a combination of pressure and heat.
In this article, we will discuss the basics of how to heat press a sweatshirt. We will go over what materials you need and how to achieve optimal results.
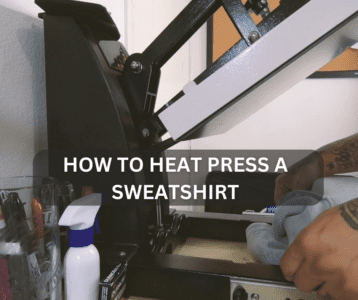
How To Heat Press A Sweatshirt
Heat pressing a sweatshirt is an easy way to add personalization to your clothing. Here we will explain the steps on how to heat-press a sweatshirt with ease.
Step 1: Preparing the Sweatshirt
If you’re looking to heat press a sweatshirt, then Step 1 is all about the preparation. After gathering materials such as a heat press machine, vinyl material, scissors, and transfer paper, it’s time to prep the garment.
To prepare the garment, you should lay out the sweatshirt flat and smooth out any wrinkles. The fabric must be free of creases or bumps for the best results.
Step 2: Setting Up the Heat Press
To begin, you’ll need to determine which type of heat press would be best for your project. Desktop models are ideal for small-scale pressing jobs, while larger floor models provide more consistent heating power. Before you start pressing, it’s essential to make sure that the temperature and pressure settings are appropriate for the fabric you’re using. It will help ensure a perfect application every time.
Once you’ve chosen a heat press model and adjusted its settings accordingly, it’s time to start prepping your garment by removing any loose threads or dust particles from its surface before placing it into the machine.
Step 3: Place the Vinyl Image
This third and final step of heat pressing a sweatshirt involves placing the vinyl image onto the garment. Before doing this, you should ensure that your iron is preheated to its highest setting, which will ensure that the vinyl is pressed on securely. Once your iron is ready, lay your design over where you’d like it to be attached to your sweatshirt. Make sure it’s centered and straightened out as much as possible before applying heat.
Step 4: Cover with Teflon Sheet
The fourth and final step to heat pressing a sweatshirt is to cover it with a Teflon sheet. This sheet protects the item from direct contact with the heat press. These are made from non-stick polytetrafluoroethylene plastic and can be used hundreds of times without showing signs of wear or tear.
It is important that you use an appropriately sized Teflon sheet that corresponds with your heat press platen size, as too small of a sheet may cause wrinkles in the fabric, while too large may lead to uneven heating throughout your design. Place the Teflon sheet onto the upper plate of your heat-press, ensuring that it is completely flat and smooth.
Step 5: Start the Pressing Process
The first step in this part of the process is to preheat the press for a few minutes before placing the item on the plate. It will ensure that both sides of the fabric are getting an even amount of heat during pressing.
Once you have preheated your press, place your item on top with any graphics or text facing up and close it firmly but gently. Depending on the type of press you are using, set either time or temperature settings as necessary – make sure to follow instructions closely if you’re using any specialized materials like HTV vinyl.
Step 6: Remove and Cool Down the Shirt
After the heat press is finished, it’s time to carefully remove the shirt from the machine and allow it to cool down. You’ll notice that the fabric is likely very hot to the touch and is still sagging slightly as it cools. You can now check your shirt for any bubbles or wrinkles, but don’t worry if there are some – they should disappear once the shirt cools completely.
How to achieve optimal results
It’s easy to create a professional-looking sweatshirt with a heat press. However, achieving optimal results requires special attention to detail and a precise process. Here are some key points to consider when using a heat press to create the perfect sweatshirt.
-
- Make sure the right type of transfer paper is used with the specific fabric of the sweatshirt.
- The temperature settings must also be carefully adjusted according to the type of transfer paper being used.
- The right amount of pressure should also be used.
- Even pressure is applied throughout all areas of the design while pressing.
- Always allow sufficient cooling time before removing any liners used during pressing.
- Ensure the type of heat press used is appropriate for the design.
Conclusion
Heat pressing a sweatshirt can be an enjoyable and rewarding experience. With the right equipment, proper technique, and a little bit of practice, you can easily create personalized designs for your garments. Heat press machines offer a variety of features that allow for more creative control over the printing process, allowing you to customize your products quickly and efficiently.
Whether you’re looking to make one-of-a-kind items or mass-produce hundreds of them, heat presses are the perfect choice for any level of customization. By following these simple steps, anyone can successfully heat press a sweatshirt in no time. I hope you learn how to heat press a sweatshirt in this article.

I’m Henry Collins and living my happy life. I’m a professional businessman and I own and run 6 Heat Pressing Services stores where I provide my clients with custom Designs on hats, mugs, T-Shirts and a lot more using Heat Press Machine. Been using a heat press for the last 4 years and people love my work. As I’ve got enough information on Heat Press I decided to make a blog on it and share my knowledge with the world. I hope, the world will appreciate it.