
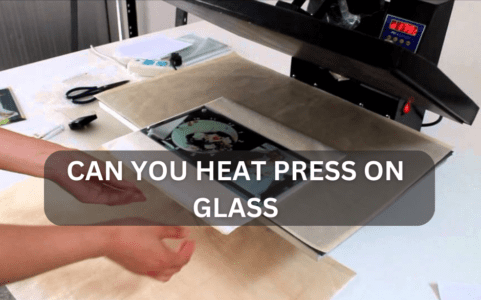
Creating unique and eye-catching glassware can be both fun and rewarding. But have you ever thought about using a heat press to customize your glass? You may ask yourself, “can you heat press on glass?” The answer is absolute! Heat pressing on glass is becoming increasingly popular, and the results are impressive.
With proper technique, you can create beautiful custom pieces with a heat press, giving your projects that added a bit of flair. It has become an increasingly popular technique for various craft projects and artworks. It can create custom window decals, etched designs, and personalized gifts.
It’s perfect for creating custom designs on glasses, mugs, tumblers, and more. With its versatility, affordability, and unique look, it’s no wonder that interest in heat press on glass is growing quickly. It’s also incredibly easy to do – all you need is the right equipment and creativity.
Let’s take a look in detail.
Can You Heat Press On Glass & Steps For Implementation
The answer is yes! With the right tools and technique, individuals can heat press onto glass items. Heat pressing onto glass can be used to create stunning designs that can be used for a variety of applications.
When considering whether or not you should take on this project, it is important to understand the process involved to achieve successful results. Here are the steps:
Step 1: Preparing Glass
When it comes to heat pressing on glass, the first step is ensuring the surface is adequately prepared. It means ensuring that the glass surface has been properly cleaned and dried, so contaminants or grease are not present. A degreasing agent should clean the surface, followed by a thorough rinse with water and a dry cloth. Once this step is complete, you can set up the heat press.
Step 2: Setting up Heat Press
If you want to learn how to heat press on glass, then Step 2: Setting up Heat Press is essential.
- To start, purchase a quality heat press machine specifically designed for glass surfaces.
- Check the manufacturer’s instructions and ensure that they match your project requirements.
- Gather your supplies, including an adhesive vinyl sheet, transfer paper, masking tape, other adhesive material, and scissors.
- You will need a flat surface, such as a table or countertop, to safely set up your heat press machine.
- Make sure the surface is clean and free from debris before setting up your machine so that it remains secure during use.
Step 3: Applying Design
Applying design is the third step in creating a beautiful, customized glass piece. With a few simple supplies and some creativity, you can create unique glassware to enjoy or give as gifts.
- To apply the design to glass with a heat press, select the image that will adorn your finished project.
- Opt for high-resolution designs that can be easily scaled up without losing quality.
- Once you have chosen your design, transfer it onto adhesive vinyl using an inkjet printer and cut around it using scissors or a cutting machine.
Step 4: Heat Pressing
A heat press machine applies intense pressure and high temperature on the object you are customizing. It causes the inks used in your design to be transferred onto the glass.
- Make sure your design has been printed or sublimated onto transfer paper so that it can easily be applied to the glass material.
- When you’re ready, place both sides of the transfer paper against each other on top of the heated plate of your press machine.
- Close it firmly and apply pressure for approximately 7-10 seconds for best results.
Step 5: Finishing Up
The fifth and final step in heat pressing on glass is all about putting the finishing touches on your project. Now that you have completed the four steps, it’s time to make sure your project looks perfect!
- Inspect your project for any loose pieces or areas that may need additional adhesion.
- If any are found, use a craft knife to lightly trim away excess vinyl or adhesive material.
- Next, let your finished product cool off completely before removing it from the heat press.
- Once done, carefully remove the protective sheeting and admire your work.
- Be sure to store it in a safe place until you are ready to showcase it – whether it’s displayed in a frame or given as a special gift.
Safety Considerations when Heating Pressing on Glass
Heat pressing on glass is a great way to add unique designs to your projects. However, it can be dangerous if the proper safety precautions are not taken. Before attempting to heat press onto glass, it is important to understand the risks and how to properly use the equipment.
When heat-pressing glass, always wear protective gloves and safety glasses. It is possible for molten plastic to splash onto the skin or into the eyes, causing serious injury or burns. Ensure that all surfaces are well-ventilated so that fumes from the heating process do not cause harm.
Make sure that any cords and power sources are in good condition before using them, and never leave your device unattended while it’s in use.
Troubleshooting Tips for Heat Pressing on Glass
Heat pressing on glass can add a unique look to projects, but it’s not without its challenges. If you’re having trouble with your heat press machine or the process itself, here are some tips that could help get you back on track.
-
- Not all types of glass are suitable; try using tempered or textured glass instead of regular window glass.
- Check the thickness – if it’s too thick, it won’t transfer well, no matter how much heat you apply.
- Next, make sure your temperature and pressure settings are correct for the type of material you’re working with.
- The ideal setting will depend upon what type of transfer adhesive you’re using and the size of your project.
Conclusion
Glass is a unique material that can be used to create beautiful and long-lasting artwork. Heat pressing on glass is an effective way to transfer images or designs onto the surface of the glass. It provides a vivid image that won’t fade with time and will remain vibrant even after being exposed to sunlight.
With proper care and maintenance, glass heat press artworks can last a lifetime and make great gifts for loved ones or treasured home decor pieces. I hope you enjoyed reading this article, “Can You Heat Press On Glass,” and that you learned something new.

I’m Henry Collins and living my happy life. I’m a professional businessman and I own and run 6 Heat Pressing Services stores where I provide my clients with custom Designs on hats, mugs, T-Shirts and a lot more using Heat Press Machine. Been using a heat press for the last 4 years and people love my work. As I’ve got enough information on Heat Press I decided to make a blog on it and share my knowledge with the world. I hope, the world will appreciate it.