
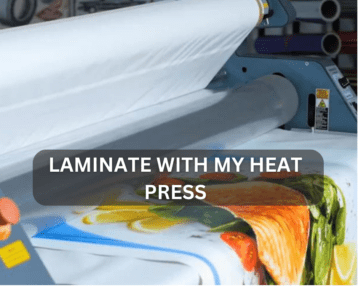
Laminating is essential to the printing and crafting process, protecting documents and making them durably waterproof. If you are a craft enthusiast with a heat press, you may be wondering if it can also be used for laminating projects. The answer is: yes! It is possible to laminate with your heat press machine and achieve professional-looking results.
Making your laminated prints is easier than you think, especially with the help of a heat press. For those unfamiliar, a heat press is a device that uses intense pressure and temperature to transfer designs onto fabric or other materials.
Having the right equipment for your craft projects is essential for creating professional-looking results. We’ll go over what materials can be used, the best process for lamination, and some tips and tricks along the way.
Let’s get started.
Can I Laminate With My Heat Press & Steps to Follow for Lamination
When it comes to binding and laminating documents, there are several options available. One of the most popular methods is using a heat press. Heat presses allow you to quickly and easily apply a clear laminate coating to your documents, making them more durable and better protected from wear and tear. But can I laminate with my heat press?
The answer is yes! Heat presses are designed to be used with special laminating pouches or sheets that contain an adhesive material on one side. When heated, the adhesive will melt onto your document, creating a protective layer that seals in the print underneath.
The process is simple and easy at home with the right supplies. You only need the pouches or sheets, scissors, and your trusty heat press.
Step 1: Prep & Measure
Heat pressing can be an intimidating task for those unfamiliar with the process. However, with a few simple steps, it’s easy to get started on your next project. Step one is all about preparation and measurements.
- Begin by gathering all the necessary materials: a heat press, laminate sheets, and the item you wish to laminate.
- Then measure both the item and the laminate sheet to ensure they are appropriately sized for each other.
- If either is too large or small, trim them as needed so they will fit correctly when pressed together.
- It’s important to be precise here; this step will ensure that your finished product looks just as crisp and professional as you envisioned.
Step 2: Cut Laminate Sheet
The next step is cutting the laminate sheet to the desired size. When cutting a laminate sheet, it is important to remember to use sharp scissors or a box cutter for the best results.
- First, lay down the laminate sheet onto a flat surface that can be used as a cutting board, such as cardboard or wood paneling.
- Then, measure and mark where you need to cut before using your scissors or box cutter.
- Make sure that all edges are even and straight for an accurate fit.
- If you’re using scissors, trace along your measurements slowly so that it doesn’t bend or tear in any areas during the cutting process.
Step 3: Heat Press Setup
Heat press setup is an essential step in the laminating process. The heat press must be set up properly to ensure a successful outcome for your project.
- Set the temperature and timer on the press according to the instructions provided with your particular heat press model.
- You must adjust these settings correctly, so you don’t damage your material.
- You should also consider your item’s size when setting up the heat press, as larger items will require more time.
- Make sure you have enough space around the machine to operate safely without risk of injury or property damage.
Step 4: Place Materials in Heat Press
Step 4 of the process is placing the materials in the heat press for lamination.
- You will need to select an appropriate substrate for your project.
- Make sure that the substrate you choose can withstand high temperatures and pressure.
- Next, ensure that all materials are properly aligned and placed within the heat press boundaries.
- It’s important to ensure that everything is secure and won’t shift during pressing so that it looks perfect.
- Once everything is set, close up the lid of the heat press and adjust the settings according to your project’s instructions.
- Then turn on your machine, wait for it to reach its desired temperature, and begin pressing.
Step 5: Remove and Cool Down
Once you have completed the first four steps of pre-heating and pressing, it’s time to move on to step five: remove and cool down.
- After pressing in place for the designated amount of time, use an oven mitt or heat-resistant glove to remove the item from the press.
- Allow your item to rest on a flat surface until it has cooled completely.
- It is important not to bend or fold your item while it’s still hot, as this can cause irreversible wrinkles or creases in your lamination material.
- Ensure you wait until all parts of the object are cooled before touching them.
- If you try picking up a hot object too soon, you risk burning yourself and damaging your work.
Tips for Successful Laminating
Here are a few tips to help ensure your laminating project goes smoothly with a heat press.
- Ensure the laminated material is properly prepared before beginning the process.
- Use an appropriate transfer paper if necessary; it will help keep the shape of your item intact while the press heats it.
- Make sure to use the correct size and thickness of laminating pouch for your document.
- Trim the edges of the laminating pouch close to the document or image to reduce the risk of wrinkles and bubbles.
- Before laminating an important document, do a test run with a few scraps of paper or a non-important document.
- Laminating can be a slow process and requires patience. Allow the document to cool completely before handling it.
Following these tips can help ensure that your documents come out of the laminator looking crisp, clean, and professional.
Conclusion
The article “Can I Laminate with My Heat Press?” concludes that it is possible to laminate with a heat press, but it’s not always the most practical solution. Though laminating with a heat press can provide an even finish and high-quality results, many people opt for more traditional methods such as cold lamination or using a dedicated laminator machine.
However, for those who choose to laminate with their heat press, there are some important considerations to keep in mind. Be sure to follow manufacturer instructions carefully, avoid overheating materials, and always use compatible supplies such as pre-cut sheets or release paper to get optimum results.

I’m Henry Collins and living my happy life. I’m a professional businessman and I own and run 6 Heat Pressing Services stores where I provide my clients with custom Designs on hats, mugs, T-Shirts and a lot more using Heat Press Machine. Been using a heat press for the last 4 years and people love my work. As I’ve got enough information on Heat Press I decided to make a blog on it and share my knowledge with the world. I hope, the world will appreciate it.