
As fun as it is to buy designs online for heat pressing, what gives more gratification is when you make your own designs with Cricut. But obviously, to attain flawless results you need to be fully aware of how to make shirts with Cricut and Hear Press.
From my personal experience, I know that nobody wants to witness extra parts of design showing up on their shirts. Even a small mistake can completely alter the entire design when you do not know your way around Cricut and the heat-pressing machine. However, these mistakes are also not unavoidable, so there is hope for all the novices that are struggling.
In order to prevent any beginner out there from repeating my mistakes, I have written the entire procedure that I followed step by step. So you will not have to go through the trouble of hours-long tutorials and can learn the entire process by merely giving a read to the article below.
How To Make Shirts With Cricut And Heat Press
The simple steps below guide you through the entire process of making shirts with Cricut and heat press.
Making Shirts With Cricut And Heat Press
What You Need
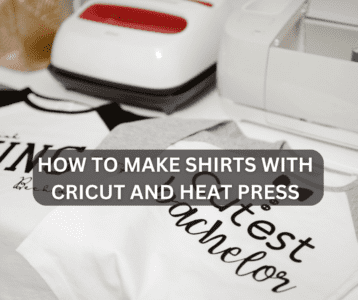
In order to make your own shirts with Cricut and heat press, you are going to need your Cricut machine, plain HTV sheets, a plain T-shirt, a weeding tool, parchment paper, an adhesive cutting mat and your heat press machine.
Creating The Design
When you are making shirts with Cricut and heat press, you need to start from scratch. This means, first creating your design on your laptop or PC before printing them on a Vinyl sheet. Once you have created the design on your laptop, you need to invert it. This is an important step as vinyl gets printed with the sheet facing down but it presses with the sheet facing up, so you need to invert the design to get the right placement.
Printing On Vinyl
Once your design is ready, take your heat transfer vinyl and stick it to the adhesive cutting mat with the right side facing down. Now open your Cricut machine and place the vinyl with the cutting mat into it. Press the print command from your laptop, and the Cricut machine will start printing the design on the vinyl sheet.
Weeding The Design
When the Cricut machine halts printing, you can remove the cutting mat from it. Place it on your work table, and peel the vinyl sheet from it. For the next step, you need to use your weeding tool. Hold the vinyl, lift it from the carrier sheet and start pulling. This will help you remove all the extra bits of vinyl from the carrier sheet. You can use the weeding tool to remove smaller bits and pieces that can not be removed by hand. To make sure that you have removed all the extra parts, open the image on your laptop screen and hold the design right next to it.
Giving The Shirt A Pre-Press
Once all the excess has been removed, the HTV design is ready for transfer. Turn your heat press machine on, and adjust the temperature according to the material of your shirt. Along with that, also alter the time and the pressure of the heat press accordingly. Once all the settings are adjusted, place the shirt on the bottom platen, cover it with parchment paper and shut the heat press machine for 4 to 5 seconds. This is called a pre-press and it will help in removing all the moisture and creases from the shirt; hence creating a smooth and creaseless surface for transfer.
Pressing The Design On The Shirt
After the pre-press, remove the parchment paper and place your vinyl transfer on the shirt. Make sure that the design is straight. You can secure it in its place with some heat-resistant tape. Once the vinyl is securely stuck to the shirt, cover it with a sheet of parchment paper. Pull the upper platen down and shut the heat press.
Removing The Carrier Sheet
Once the timer of the machine dings, it indicates that it is time to remove the shirt from the heat press. Lift the parchment paper and then remove the tape. Remove your shirt from the bottom platen, and place it on your work table. It is time to peel the carrier sheet from the shirt. Make sure that you peel it off carefully as the vinyl will still be hot. Lo and behold, you have successfully created your own design and transferred it to a shirt. You can use the same step-by-step method for making more shirts, or for adding more designs to the same shirt.
What To Keep In Mind
Even though the entire process of making shirts with Cricut and heat press is pretty basic, you do need to follow a few precautionary measurements to get the best results. The first is to never transfer your design on the vinyl sheet with the sheet facing up. This will print the design on the carrier sheet instead of the vinyl sheet. In addition to that, you also need to make sure to peel the carrier sheet according to the fabric of your shirt. If you are printing on wool, then you should let the vinyl cool down and then remove the carrier sheet. However, for cotton or polyester, you need to peel the carrier sheet as soon as the shirt is removed from the heat press. Lastly, always make sure to double-check your HTV with the image of the design on the laptop screen to ensure that you have eliminated all the excess. Otherwise, you will end up transferring extra bits of vinyl along with your design.
Conclusion
Making your own designs on shirts requires learning how to use your Cricut machine along with the heat press as they both go hand in hand. Instead of leaving you to waste hours on the internet, I have compiled all the knowledge regarding these two machines along with the most simple method of making shirts with Cricut and heat press in the article above.

I’m Henry Collins and living my happy life. I’m a professional businessman and I own and run 6 Heat Pressing Services stores where I provide my clients with custom Designs on hats, mugs, T-Shirts and a lot more using Heat Press Machine. Been using a heat press for the last 4 years and people love my work. As I’ve got enough information on Heat Press I decided to make a blog on it and share my knowledge with the world. I hope, the world will appreciate it.