
Be it a mission to surprise your best friend or your boyfriend, pictures on mugs are always a pleasant yet memorable gift to relish for life. It would be no wrong to say that such gifts are personalized and let the next person feel more loved and aware of how you love them and want always to keep the memories close.
On the other hand, you are planning on running an online or offline mug printing business with a heat press. Before going any further, I would mention that you are going to be successful soon because the demand for such gifts in these years has increased.
But the real question is how to put pictures on mugs with a heat press machine. Now, that’s interesting and going to be pretty simpler. Yes, I will make it all simple for you. So better, let’s begin with my guide that I have used and seen many people doing this way!
A Short Guide on Putting Pictures on Mugs with Heat Press
Printing images on coffee mugs can be a fun and easy DIY project if you have the correct supplies and layout in mind. Now it is possible to print any photo on a mug, and not only will it last longer, but it won’t get scratched. So, let’s begin:
Things you need
- A mug, of course
- Printed photo you want to print
- Heat press machine
- Scissor
A step-by-step guide to put pictures on mugs with a heat press
Step 1: Choose your preferred mug
First thing first, ceramic is the first priority that you should choose. With that, make sure that you don’t go for the same-colored mug; a print such as black on black will not give you the right results. Go for the contrast coloring scheme. You can choose any color, but make sure that the print outstands the mug.
I would mention that I don’t recommend wooden mugs or mud mugs as they cannot withstand prints.
Step 2: Choose the picture
Moving on to the second step, now choosing the picture doesn’t mean just choosing your favorite print. But this step is to tell you to go for the right size image. You can also go for a squared image and a rectangular one to print on the mug. Also, the picture should have great resolution power and pixels, so it doesn’t look messy later on the mug.
Step 3: Printing the picture
Make sure that you are printing on the paper side with the coating, as this is equally as significant. When you’ve finished putting the finishing touches on everything, print off your graphics and move on to the next step. Take the print on printing paper that is also transferable. You can use the transfer paper here that is also suitable for heat transfer or iron transfer as they are almost the same.
Step 4: Putting a photo on the mug
The moment has come to place the picture on the cup. You can put a picture on one side of the mug or all the way around it. The mug’s surface must be cleaned so that any dirt or dampness can be eliminated.
Now flip the image on the transfer paper over so that the front of it is facing the mug. Wrap the mug in a paper now, making sure it is secure. In addition, you need to ensure that the paper is placed directly against the mug’s surface. Put a piece of tape that can withstand heat on either end of the print transfer and use it to secure the transfer paper. Lastly, you must ensure that the paper has not been moved at any point throughout the process.
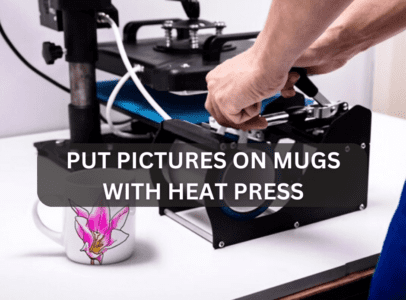
Step 5: Using the heat press machine
To begin, depending on the mug and design you want to use, warm your heat press for a specific period of time and temp. The next step is to firmly and symmetrically attach the design or photo to the mug. After you’ve prepared the mug for the heat press, put it in there and press it for the specified amount of time. After that, you can use the software to add your own design or photo to the mug.
Step 6: Cool down the mug
Open the press when the necessary amount of time has gone, then take out the mug. Remove the transfer paper from the mug as quickly as possible by unpeeling the tape that is holding it in place. The procedure for sublimating your mug is almost finished. Put your piping hot mug down and give it plenty of time to cool down before picking it up again. Keep waiting until you can touch it without being burned.
Other ways of putting pictures on a mug – Using Iron
Mug printing is a straightforward process that requires only a few inexpensive tools to complete at home. You’ll need a mug, a computer with a printer, and special mug transfer paper to begin. After gathering these materials, you can decide whether to make your own design for the mug’s print or use one already existing.
Once the design is complete, it can be printed onto transfer paper and then trimmed to size. After that, you should start by placing the transfer paper onto the mug with the printed side facing down and then firmly pressing it down.
At this point, you can use a regular iron to transfer the image onto the mug by pressing the transfer paper onto the cup for around 30 to 40 seconds. Once this is done, you may begin to carefully peel away the transfer paper, revealing the printed pattern on your mug.
Final words:
The number of people purchasing mugs printed with uplifting sayings, pictures of famous people, and imaginative patterns is growing steadily. Meanwhile, it is now possible to generate income from the sale of sublimation mugs thanks to the growing demand for these products.
That being said, above, I have mentioned a detailed guide for starting your own business as it is high time, and one should not miss the opportunity!

I’m Henry Collins and living my happy life. I’m a professional businessman and I own and run 6 Heat Pressing Services stores where I provide my clients with custom Designs on hats, mugs, T-Shirts and a lot more using Heat Press Machine. Been using a heat press for the last 4 years and people love my work. As I’ve got enough information on Heat Press I decided to make a blog on it and share my knowledge with the world. I hope, the world will appreciate it.