
There is no denying that digital world is taking over and we all are loving it and in awe of the technology. In a heat press, it is not a big deal but if you are not a Gen Z you would now what I am talking about. For Gen Z starting a business isn’t a big deal, you can easily get a machine and start your own small business.
Meanwhile, a person who is always full of ideas, as well as anyone who wants to start a new business or indulge in a new hobby, will find this to be an excellent line of work. Recently, numerous numbers of brands are coming up with their digital heat press machine.
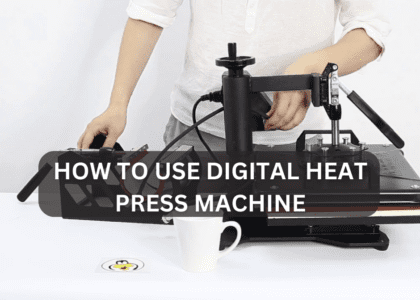
So, today I will be talking about how you can use a digital heat press machine without facing any inconvenience. Before starting, I would mention that I have already used a digital heat press machine so I will be sharing a first hands on experience with you with proper instructions. So, let’s dig in:
How to use a digital heat press machine? – A Detailed Guide
Starting with the use of digital heat press machine, it is wise to now about certain elements. Whether you are buying or just doing your research, remember that the purpose of using your heat press machine should be clear on what material you are going to use.
Why I am saying this? Because when talking about the use, the temperature settings, the materials always comes first so its always wise to think before! Moving on, now there are types of heat press transfer that you can use. So, I will be discussing them here for a bit.
Types of transfer paper for heat press machine
Transfer paper plays a crucial role in the heat pressing procedure. Printing your design in the first place will be done on a sheet like this, which has wax and pigment applied to it. As your clothing goes through the press, it goes over this. Your printer and the colour of your material will determine the type of transfer you need. A few of the most typical examples are shown below.
Laser: Transfers made with a laser printer require special paper; as previously stated, not all printers can use the same material. When compared to inkjet paper, the results from a laser printer are often thought to be poor.
Inkjet: To make inkjet transfers, you’ll need special paper for your inkjet printer. One important point to remember is that white cannot be printed using an inkjet printer.
Sublimation: Paper designed for sublimation transfers requires specialised equipment and ink, making it a more expensive option. The ink here becomes gaseous, penetrating the fabric and permanently coloring it.
That’s all for the transfer paper and now we are going to discuss the actual guide, the reason you are here but it was equally important to go through these!
Step-by-step Guide to use a digital heat press machine
Step 01: Setting the machine
First and foremost, you need to set your heat press machine. For the setting, you need to look at the instructions that come up with the machine because in digital heat press machines, instruction varies with the models.
Also, make sure that you have placed the machine on a smooth and plain surface so that the machine stays at the place and doesn’t destroy the pressing process.
Step 2: Setting the temperature
Turn on the heat press and adjust the temperature to your liking. To adjust the temperature, spin the thermostat knob clockwise. In another way, you can also use the up and down arrow buttons, on certain models until the desired temperature is attained. To indicate that it has attained the desired temperature, turn off the indicator light.
Step 3: Setting the pressure
The next step is to adjust the pressure. You may set the amount of pressure you want by turning the knob until you reach the desired level. In general, thicker materials need to be subjected to a greater amount of pressure, whereas thinner ones do not.
In most situations, moderate to high pressure is what you want to achieve. However, you should try several settings until you find the one that works best for you.
Step 4: Setting the time
Next, decide how long you want the pressure to remain at its current level. If you have a timer, use it now to calculate how long the transfer will take. There is a wide range of possible durations, from as little as four seconds to as much as thirty minutes, depending on the sort of transfer being performed. But, if you are confused, you can set the timer for 30 seconds maximum!
Step 5: Position your shirt or any fabric
Place the shirt and remove any lint, if there is and make sure that the surface is plain without any wrinkles. It will help you in getting the clear print without any inconveniences. Also, you must ensure that there is no zipper etc., on the part you are trying to heat press.
Step 6: Pre-press and re-position the fabric
After you’ve prepared the area for printing, close the heat press for three to five seconds to get rid of any residual moisture and smooth out any wrinkles. Dehumidifying before applying will give you great results, especially in terms of durability through several washings and dryings.
Step 7: Heat press the shirt
When the transfer is in the desired location, lock the heat press to secure it. Open it after few seconds and once it gets cold remove the transfer sheet. I believe, 5 seconds would be more than enough to wait here!
Final words:
A digital heat press machine isn’t as difficult to use as the manual heat press machine. So, I believe that making an investment on this is worthy instead of getting your work done from the manufacturers. Other than that, we have the guides of different heat press machines on our website, so you can always check those too!

I’m Henry Collins and living my happy life. I’m a professional businessman and I own and run 6 Heat Pressing Services stores where I provide my clients with custom Designs on hats, mugs, T-Shirts and a lot more using Heat Press Machine. Been using a heat press for the last 4 years and people love my work. As I’ve got enough information on Heat Press I decided to make a blog on it and share my knowledge with the world. I hope, the world will appreciate it.