
Heat press machines are essential for any graphic design or printing business. By using a heat press machine, you can quickly and easily transfer images to t-shirts, hats, mugs, and more. If you want to learn how to use Ephotoinc Heat Press, this article will provide a step-by-step guide on properly setting up your machine.
Ephotoinc offers several models of heat presses designed for use with various fabrics. We’ll cover the basics of using an it and provide tips for getting the most out of your machine. We’ll also go over some common mistakes to avoid when using a heat press.
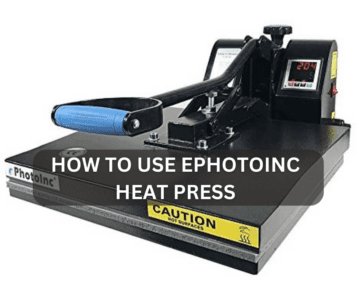
It is a great choice for your project needs. This machine allows users to quickly and easily transfer customized images onto clothing, hats, and other textile items. It is an ideal tool for businesses that need to customize apparel or for individuals who like to make their own personalized items.
Let’s get started.
How To Use Ephotoinc Heat Press
Here is the step-by-step guide on how to use the Ephotoinc heat press machine.
Step 1: Setting Up Machine
Begin by checking all of the electrical connections on your press. Be sure they are secure and free from damage or wear. Next, adjust both upper and lower pressure knobs until they line up with the recommended settings suggested by Ephotoinc.
After this, inspect each heating element separately to ensure proper functioning before turning on the machine. Before beginning any pressing process, check that all clamps and locking mechanisms are firmly in place.
Step 2: Selecting Heat Press Settings
Depending on the type of material, you will need to adjust your heat press accordingly. For example, if you are pressing vinyl onto a cotton shirt, you should set your Ephotoinc Heat Press temperature to 320°F and time setting to 15 seconds.
If you are applying for a rhinestone transfer instead, then you should increase both temperature and time settings; aim for 350°F and 20-25 seconds, respectively. It is important to follow these recommendations as they will ensure that your design adheres properly without damaging your garment or imprints.
Step 3: Placing Transfer on Garment
Before placing the transfer onto the garment, it is important to prepare both the substrate and transfer to ensure that your image turns out correctly. Make sure you have a flat surface for pressing, so the imprint doesn’t appear warped, distorted, or off-center when finished.
Next, place your garment on top of this surface and ensure no wrinkles or lumps could interfere with a good press. Locate where you want to place your transfer; if possible, use masking tape as a guide to help with placement accuracy.
Step 4: Applying Pressure and Time
Pressure in this step should be strong enough to transfer your design or image onto your product. The best way to ensure proper pressure is to consult your manufacturer’s guide; each machine may have different recommended settings based on the type of material and thickness of the item being pressed.
Once you’ve set the correct pressure level, you must keep it consistent throughout the pressing process for maximum effectiveness.
Step 5: Removing Transfer and Cooling
In order to remove the transfer, unplug the heat press and lift it on the handle of your heat press machine. Peel back one corner of your printable material while still keeping it secure to ensure that all parts adhere together correctly.
Be sure to peel slowly and evenly to avoid any wrinkles or tears in the image. Once you have removed all your printed material, place your item aside for about 15 minutes so it can cool before using it. It will help preserve its shape and prevent damage from occurring due to sudden temperature changes.
Some Common Mistakes to Avoid When Using a Heat Press
Using a heat press is an efficient way to apply designs to any fabric or garment. However, common mistakes can easily be made when using a heat press like any other machine. Here we will discuss some of the most common mistakes you should avoid when using an Ephotoinc heat press.
- You must read through your product’s manual before attempting to use the heat press for the first time.
- It will ensure you understand how to properly use the equipment and its features.
- Make sure that your working space is well-lit and clean before starting any pressing project.
- Cleanliness is key, as dirt on the surface of your item can cause damage and mess up your design.
- If you are using a heat press with an automatic timer, make sure that you get the timing down perfectly.
- If the timer is set too short or too long, it can cause damage to your item and design.
Benefits of Using Ephotoinc Heat Press
A heat press is a great tool for any business or home craft project. The Ephotoinc Heat Press is ideal for those looking to take their projects to the next level. This high-quality machine can help you quickly and easily produce professional results.
Using an Ephotoinc Heat Press can save time, money, and hassle while providing superior results on many types of materials. Its digital control panel allows users to adjust pressure, temperature, and timing settings with precision and accuracy, allowing them to achieve perfect results every time. It has a sturdy stainless steel construction that ensures long-term durability and performance.
Conclusion
The conclusion to the article ‘How To Use Ephotoinc Heat Press’ is that heat presses are an excellent tool for creating personalized items like t-shirts, mugs, and hats. You can create high-quality prints quickly and easily with a quality heat press machine.
Using a heat press requires knowledge and skill, but anyone can create beautiful prints at home with practice and patience. Before you start printing your own designs, be sure to read up on proper safety procedures and familiarize yourself with the machine. It’s also important to use high-quality materials when using a heat press so that your projects turn out their best. Ultimately, the possibilities of what you can do with a heat press are endless.

I’m Henry Collins and living my happy life. I’m a professional businessman and I own and run 6 Heat Pressing Services stores where I provide my clients with custom Designs on hats, mugs, T-Shirts and a lot more using Heat Press Machine. Been using a heat press for the last 4 years and people love my work. As I’ve got enough information on Heat Press I decided to make a blog on it and share my knowledge with the world. I hope, the world will appreciate it.