
If you’ve ever bought a shirt, hat, jacket, or other apparel with a logo and wanted to remove the logo and make it look new again, you’re in luck. Removing heat-pressed logos is easy and can be done at home with some simple supplies. This article will show you how to remove heat pressed logos quickly and effectively.
We all know how it goes when you’re after that perfect t-shirt, only to find out that the logo on the chest ruins the look. Heat-pressed logos are a common feature of many apparel products, but some people prefer a more minimalistic look and don’t want to have any design elements on their clothing.
When it comes to fashion trends, logos are a big part of the culture. But lately, there’s been an increasing interest in removing heat-pressed logos from clothing items. We’ll go over each step of the process and provide tips from our experts on how to get the job done.
Let’s get started.
How To Remove Heat Pressed Logos
Have you ever been in a situation where your favorite shirt or piece of clothing was ruined due to an unwanted heat-pressed logo? Removing these logos can be difficult. However, it is possible with the right technique and materials. Here are some simple steps for how to remove heat pressed logos without damaging your clothes.
Step 1: Gather Supplies
To begin, you will need basic items such as a spray bottle, paper towels or rags, rubbing alcohol or acetone nail polish remover, and a plastic scraper. Having these supplies on hand will make the process of removing heat-pressed logos much easier.
You may also consider using an ironing board and pressing cloth to protect your work surface while working with the fabric and heated tools. Having all of these supplies available before beginning the removal process will help ensure that you have a successful outcome without damaging your fabrics.
Step 2: Place Logo Under Heat
Placing the logo under heat should be done with care and caution to ensure that you do not damage the item or burn yourself. The most effective method for this task involves using an iron set in a low-temperature setting and ensuring that it does not stay in one place for too long.
- Before beginning your task, ensure that your work surface and iron are clean and debris-free.
- Place your logo face down onto your work surface and then put the hot iron directly onto it.
- Leave the iron in place for around 15 seconds before moving it slightly to another spot on the logo.
- Repeat this process until every area on the logo has been heated evenly, taking extra care around any edges or corners.
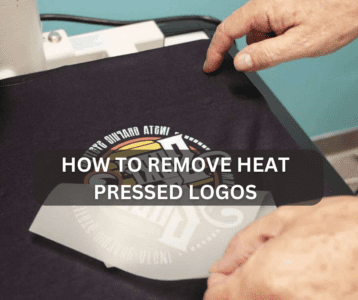
Step 3: Peel Away Logo Layer
Once you’ve prepared your garment by heating the logo, Step 3 is to peel away the logo layer. To do this carefully, use a pair of tweezers or pliers to slowly pull away at one edge of the logo and separate it from the garment.
- This process should be done gently so you don’t damage the logo or the fabric beneath it.
- If your garment is particularly delicate, consider using a heat gun instead of tweezers, as this will provide more control.
- Next, locate any fasteners holding the logo in places such as threads or buttons and gently remove them with pliers.
- Once all of these components have been removed, you can then begin lifting off pieces of the logo until it has been completely removed from your garment.
Step 4: Clean Logo Residue
Clean Logo Residue is the fourth step in removing a heat-pressed logo. It’s important to clean any remaining residue from the fabric’s surface to ensure that no further damage occurs.
- First, take a dry, lint-free cloth and gently rub off any visible residue.
- If needed, lightly dampen the cloth with rubbing alcohol or vinegar and continue to remove any remaining residue until it is completely gone.
- Once all logo residues have been removed, rinse the vinegar or alcohol solution with cool running water.
- Make sure that all of the cleaning solutions have been rinsed away before drying out your fabric, as leaving it on can damage or discolor your material.
Step 5: Repeat the Process As Needed
Step 5 in this process is to repeat the process as needed. Depending on the logo’s size and complexity, multiple applications of heat remover may be necessary. If only part of the logo has been removed, it may be necessary to reapply pressure with a towel or cloth before applying more remover.
Once a few layers have been removed, and there are no more visible remnants of the logo, you can then begin to assess whether or not additional treatments are required for complete removal. By repeating the steps outlined above until all traces of adhesive have disappeared from your garment, you will have successfully executed this task.
Common Precautions While Removing Heat-Pressed Logos
For those looking to remove heat-pressed logos from clothing, it is important to take the necessary precautions before starting. It is a technique used to permanently affix images and designs onto fabric. It is an irreversible process, but with some care and caution, it can be done safely.
-
- When removing heat-pressed logos or designs, the most important thing is to protect yourself and the fabric in question.
- It includes wearing protective gloves and using a face mask or respirator while working.
- Always mark which areas of clothing need special attention, as this will ensure that no damage is caused during the removal process.
- Make sure you work in a well-ventilated area, as fumes may be generated when using certain chemicals for tough spots on the fabric.
Conclusion
The conclusion to the article ‘How To Remove Heat Pressed Logos’ is that the process is relatively straightforward, and with some patience, you can have success in removing logos from any fabric.
It’s important to be aware of the differences between heat pressing and ironing and to understand what materials are appropriate for each technique. With practice and perseverance, you can easily remove any unwanted logo or design from almost any type of fabric.
I hope you enjoyed the article. If you have any other tips or suggestions, please feel free to add them in the comments section below.

I’m Henry Collins and living my happy life. I’m a professional businessman and I own and run 6 Heat Pressing Services stores where I provide my clients with custom Designs on hats, mugs, T-Shirts and a lot more using Heat Press Machine. Been using a heat press for the last 4 years and people love my work. As I’ve got enough information on Heat Press I decided to make a blog on it and share my knowledge with the world. I hope, the world will appreciate it.