
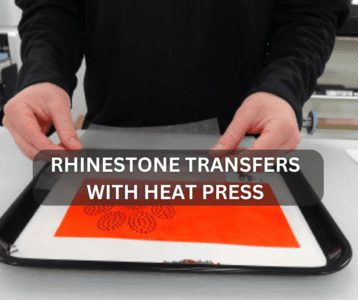
Adding sparkle to your garments and accessories is a great way to stand out. Rhinestone transfers are a simple way to add a touch of glamour and make custom designs on almost any fabric. However, many people wonder how to apply rhinestone transfers with heat press.
These can be used to add some sparkle and shine to just about anything. Whether you’re working on a shirt, mug, canvas bag, or fabric project, applying rhinestones with a heat press is the way to go.
It offers a unique style of decoration that will make any project stand out. With the help of a heat press, you can easily apply for rhinestone transfers onto a variety of materials.
Let’s talk more about how to use this method.
How To Apply Rhinestone Transfers With Heat Press
Adding a unique and eye-catching design to any project can be daunting, but it doesn’t have to be. Rhinestone transfers are an easy and fun way to add sparkle and dimension to any project. Whether you’re creating t-shirts, hats, or anything in between, using a heat press with rhinestone transfers is a great way to take your project to the next level.
We’ll discuss the steps necessary for applying for rhinestone transfers with a heat press in an easy-to-follow manner.
Preparation: Gather Materials
Preparing to apply for a rhinestone transfer with a heat press can seem daunting, but with the right materials and tools, it’s easy. To get started, you need to gather your materials and tools before starting the application process. The most important items on hand are a heat press or iron, the transfer paper and design, an adhesive sheet or spray glue, scissors, and tweezers.
If you plan on using iron for your project instead of a heat press, ensure it’s one with adjustable temperature settings that get hot enough for rhinestones. You also want to check that your transfer paper is compatible with the garment you plan to press.
Placement: Arrange Rhinestones
Applying rhinestone transfers to fabric with a heat press is an easy and effective way to add some sparkle and flair to any project. Taking the time to arrange your rhinestones properly can make all the difference in achieving a professional look for your design.
Before placing any stones, lay them on paper or another flat surface so you can get an idea of how they’ll look together when they’re in place. It will also allow you to move them around until you find a layout that works best for your desired project outcome.
Activation: Start Heat Press
Start Heat Press is the third step to achieving a successful rhinestone transfer. The heat press is essential in transferring rhinestones onto any surface you desire. It should be activated and set to the correct temperature before beginning your project. To do this, start by plugging the power cord into an electrical outlet and flipping the switch.
Adjustment: Monitor Temperature
You must adjust the temperature by turning a dial or pressing buttons on digital models. When setting up, it’s important to follow manufacturer instructions, as different products have different requirements for optimal performance.
Once your heat press has been activated and adjusted, you can begin applying for rhinestone transfers. Be sure to place a heat-resistant protective sheet over your material so that your iron does not damage it during application.
Pressure: Apply Pressure
Pressure can make or break your rhinestone transfer application with a heat press. If you don’t apply the right amount of pressure, your project could look sloppy and uneven – not to mention the time and money you’ll have wasted. But don’t worry – getting the perfect pressure on your heat press is easier than you think.
Make sure to use heavy enough paper for any transfers involving larger stones. Place the transfer sheet on top of it, then place both items into your heat press together. Increase tension until it’s tight but comfortable, then close the press for a few seconds before opening it again to check if everything has transferred properly.
Completion: Ready to Wear
The last step is to be ready to wear whatever you create. You’ll need to wash and dry your garment before wearing it. They are a great way to express your individual style and make sure you look the best for every occasion. Whether you’re looking to glam up an outfit for a night out or decorate workwear for added personality, rhinestone transfers are perfect for giving any garment the finished look you’re going for.
Make your wardrobe sparkle and shine with this step-by-step guide on how to apply rhinestone transfers with heat press. As an added bonus, you can customize any garment with a unique design that stands out from the crowd.
Precautions While Applying for Rhinestone Transfers with Heat Press
Applying for rhinestone transfers with a heat press may look intimidating at first, but it does not have to be. With the right tools and safety precautions, anyone can learn how to apply these unique and beautiful designs on clothing, home decor items, and more.
Here are some key tips for taking proper precautions while applying for rhinestone transfers with a heat press.
-
- Always wear protective gloves when handling the heat press’s hot and cold parts.
- Ensure your heat press is properly calibrated and in good working order.
- Always be aware of the temperature setting on the heat press.
- If the design has too much heat, it can melt the vinyl and ruin the transfer.
- Make sure to have a clear, flat working surface in front of you while applying for rhinestone transfers with a heat press.
Conclusion: Enjoy Design
Designers of all kinds, including fashion designers, interior decorators, and graphic designers, are always looking for new ways to make their designs pop. Rhinestone transfers are a great way to add that extra sparkle and shine to any design. With the help of a heat press, it’s easy to apply for rhinestone transfers quickly and effectively with professional-looking results. The result is an eye-catching masterpiece that will surely draw attention.
How To apply rhinestone transfers with heat press can initially seem intimidating, but it doesn’t have to be complicated or time-consuming. When you understand the process and follow the simple steps outlined in this article, you can easily create beautiful designs using rhinestones. So, grab your heat press and let your creativity shine.

I’m Henry Collins and living my happy life. I’m a professional businessman and I own and run 6 Heat Pressing Services stores where I provide my clients with custom Designs on hats, mugs, T-Shirts and a lot more using Heat Press Machine. Been using a heat press for the last 4 years and people love my work. As I’ve got enough information on Heat Press I decided to make a blog on it and share my knowledge with the world. I hope, the world will appreciate it.