
Using a heat press is a great way to add personal designs to any garment or textile. Whether you’re a small business owner or just getting started with heat press customization, this article will provide you with all the information you need to get started with your Vevor Heat Press.
Heat presses are great tools for transferring designs onto different types of materials quickly and easily. With a Vevor Heat Press, you’ll be able to create one-of-a-kind items that your friends will love. At Vevor, they offer a variety of heat presses that can help you achieve professional results with ease.
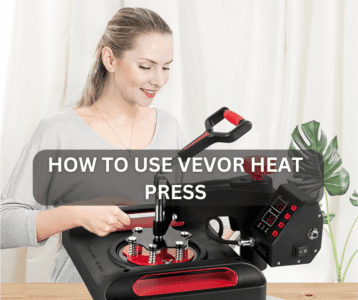
Are you looking for an easy and efficient way to customize apparel? Then look no further than a Vevor Heat Press. This versatile machine allows you to create unique designs on t-shirts, hats, hoodies, and more in a matter of minutes.
Let’s get started.
How To Use Vevor Heat Press
With this cost-effective and versatile machine, you can quickly create personalized gifts for friends and family or start a business selling your own products. We will walk you through the steps of how to use vevor heat press so that you can get started right away.
Step 1: Assemble the Heat Press
Before assembling the machine, make sure all parts have been included in the package and that nothing is missing or damaged. Once you have checked that everything is intact, attach the base plate to the back of the machine with the screws provided in your package. Next, attach one side of the arm assembly to each end of the main body using screws again and secure with washers if needed.
Step 2: Choose and Prepare Your Material
Now that you have your Vevor Heat Press, it’s time to choose the material you will be pressing. It is important to select a material compatible with the heat press. You should also consider how long it takes for the material to heat up and cool down, as this will affect the amount of time you need for each project.
Once you have chosen your material, preparing it properly before putting it into the machine is important. Make sure to wash or clean your fabric if needed, then pre-press with an iron if necessary. If you are using transfer paper for a design or logo, make sure to cut out any excess before applying it to your garment or surface.
Step 3: Place Transfer on the Substrate
Begin by preheating your heat press for at least 5 minutes before placing the transfer on it. It will ensure that your Vevor heat press is up to temperature and ready to press. Place the transfer face-up onto the bottom plate of the machine so that it’s centered within its borders, and make sure that there are no air bubbles trapped underneath it. Afterward, secure your substrate onto the top platen with protective fabric or paper towels for added protection.
Step 4: Adjust Settings and Time
The Vevor heat press comes with a digital timer and temperature display which should be used to set the desired time for pressing. It can be done by simply turning the knob to adjust the time on the digital timer and setting the temperature with the up or down arrows.
It’s important to remember that some materials require longer pressing times than others, so it’s best to research this ahead of time in order to know what settings you will need. Once you have adjusted these settings accordingly, you can begin your pressing process.
Step 5: Remove and Check Results
To remove your finished design from the press, lift up the handle and carefully remove your item. Keep in mind that it will still be hot, so use caution when handling it. When you get a chance to inspect your work, make sure that all of your lines are crisp and cleanly pressed with no smudges or missing spots. If something isn’t right, you can always put it back in the press for additional time or try again with a different temperature setting until you get it perfect.
Benefits of Vevor Heat Press
Heat pressing is an efficient and cost-effective way to make custom apparel. Vevor Heat Press machines are reliable, easy-to-use options for any crafter or small business looking to add personalization to clothing items. From t-shirts, hats, and bags to mugs and plates, a Vevor Heat Press can help you easily create professional products.
Whether you’re making unique gifts for friends and family or starting your own small business, the versatility of a Vevor Heat Press gives you endless possibilities. With safety features such as a temperature alarm and automatic shutoff, this machine provides both convenience and peace of mind when using it.
It also boasts easy assembly, quickly heating up in two minutes for fast results with high accuracy temperatures that can be adjusted according to the material being pressed.
Conclusion
The conclusion of the article “How To Use Vevor Heat Press” is an important reminder that a heat press can be a very useful tool for professional-looking designs on various fabrics. With the right steps and a little bit of practice, anyone can learn how to use a Vevor heat press effectively and create stunning projects. It may take some time to master this tool, but it will be worth it in the end when you have fantastic results every time.
Heat presses are great tools for adding beautiful designs to fabric items such as t-shirts, hats, bags, and more. A Vevor heat press provides quality results with each use. The process of using this equipment is not difficult but does require some knowledge and practice in order to get the best results possible. Following the above steps will help ensure that every project looks its best every time.

I’m Henry Collins and living my happy life. I’m a professional businessman and I own and run 6 Heat Pressing Services stores where I provide my clients with custom Designs on hats, mugs, T-Shirts and a lot more using Heat Press Machine. Been using a heat press for the last 4 years and people love my work. As I’ve got enough information on Heat Press I decided to make a blog on it and share my knowledge with the world. I hope, the world will appreciate it.