
Are you ready to take your heat press to the next level and make some awesome hats? It’s easier than you think! If you own a heat press, you can easily convert it into a hat press with a few simple steps. In this article, we’ll be walking through how to change heat press to hat press so that you can begin making stylish caps and hats immediately.
Whether you’re converting a flat heat press or a cap press, you can learn how to make the change in no time. With the right materials and patience, anyone can transform their press into a hat printing powerhouse.
The need for different printing methods and technology has become increasingly important as the fashion industry continues to evolve. Heat presses have been used for decades as an efficient way to apply graphics to garments, but a new process known as hat pressing is growing in popularity.
Let’s detail about changing the heat press to a hat press and some precautions while doing this.
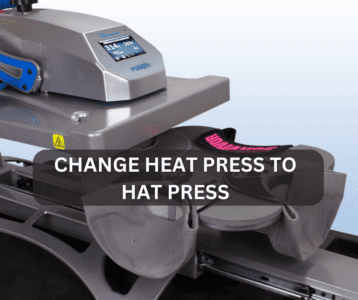
How To Change Heat Press To Hat Press
Changing a heat press to a hat press is an easy process that requires minimal equipment and effort. Whether you want to take on a new hobby or expand your business, you can easily transform your heat press into a hat press with the right tools and knowledge.
We will give you step-by-step instructions on switching from one type of machine to the other.
Step 1: Gather necessary tools and equipment
The first step in changing a heat press to a hat press is to gather all of the necessary tools and equipment needed for the job. It may include an adjustable wrench, hex key set, screwdriver set, pliers, drill bits, replacement parts, and adhesive tape.
It is also important to ensure that all the tools are in good condition before beginning any project involving machinery or electrical components. Any loose screws should be tightened, and any worn parts should be replaced before converting the heat press machine.
Step 2: Unplug the heat press
The next step in converting your heat press to a hat press is unplugging the heat press. Unplugging your machine is essential for safety and helps you avoid any costly mistakes during the process. It’s important to ensure that all power sources are disconnected before beginning maintenance on the machine.
To do this, locate the power cord, plug it out of its socket, or switch it off if you have a wall switch outlet. Ensure no other machines or outlets are connected to the same circuit breaker as the heat press. If so, turn them off as well.
Step 3: Remove the lower platen
In the third step, users must remove the lower platen from the heat press bed. It is an important step as it allows the user to replace their lower platen with a special flat hat clamshell attachment. Before removing the lower platen, users should unplug their machine and allow it to cool down for at least 15 minutes.
Once it has cooled, loosen and remove all screws securing the lower platen in place. Carefully lift on one side of the platen and then pull away from its base plate until completely removed.
Step 4: Replace the lower platen with the hat press attachment
The platen is the flat surface on the bottom of the heat press, which is essential for pressing hats onto different apparel items. Keeping track of all screws removed during this process will make reinstalling them much easier.
Once all screws are removed from around the platen’s edges, they should come off easily and can be set aside until it they are ready for reattachment. It’s important not to lose any of these parts as they are necessary for attaching both parts securely when finished.
Step 5: Adjust pressure settings
Start by loosening the pressure setting knob on top of the press until it won’t move further. It will ensure that when you adjust your pressure setting, you won’t damage any components in the machine. Next, turn the screws on either side of your platen clockwise using a flathead screwdriver until they stop moving.
It will increase your maximum pressure level and allow more consistent impressions when working with thicker materials like caps or hats. Use a ruler or measuring tape to adjust both sides evenly. It will help create an even impression across all surfaces being pressed.
Step 6: Test on scrap material
If you have completed all the steps in converting your heat press to a hat press, it is time for Step 6: Test on scrap material. Before using the press on actual garments, you must verify its operation by running practice tests with scrap fabric.
Begin by picking up fabric scraps from a local craft store or online retailer. When selecting material, choose fabrics similar in weight and texture to those used when pressing hats. Cut two pieces of fabric slightly larger than the size of a baseball cap brim so that they can fit into the machine comfortably without obstructing any components.
Precautions while changing heat press to hat press
When changing a heat press from pressing shirts to hats, it is important to take the following precautions:
-
- Make sure the heat press is cool and unplugged before making any changes.
- Clean the platen thoroughly to remove any debris or residue from previous presses.
- Adjust the pressure accordingly for the type of hat being pressed. Hats require less pressure than shirts.
- Use a hat press attachment or a smaller platen specifically designed for hats to ensure proper alignment and avoid wrinkles.
- Test the press on a spare hat before pressing a customer’s hat to ensure the correct temperature and pressure settings.
- Always wear heat-resistant gloves to protect your hands while handling the press.
- Follow the manufacturer’s instructions for your specific heat press to ensure proper use and avoid potential damage to the machine or injury to yourself.
Conclusion
The article’s conclusion on how to change heat press to hat press is important – it is necessary for anyone considering making the switch to ensure that they are doing it safely and efficiently. After all, this process does involve some potentially dangerous materials and equipment.
When switching from one type of press to another, it’s important to consider the different types of materials involved and ensure you have the correct tools. Be certain you understand the safety precautions associated with this process before beginning. Once these steps are taken, you should have no problem changing your heat press into a hat press.

I’m Henry Collins and living my happy life. I’m a professional businessman and I own and run 6 Heat Pressing Services stores where I provide my clients with custom Designs on hats, mugs, T-Shirts and a lot more using Heat Press Machine. Been using a heat press for the last 4 years and people love my work. As I’ve got enough information on Heat Press I decided to make a blog on it and share my knowledge with the world. I hope, the world will appreciate it.